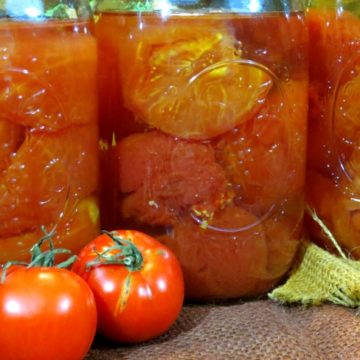
Canned Whole Tomatoes Packed in Water
Ingredients
- 20 Pounds Tomatoes Aprx 7 large tomatoes per Quart
- Bottle of Lemon Juice
- Bottle of Vinegar
- Salt
- 7 Quarts Sterilized (Dishwasher or handwash)
- Rings Enough for Jars and have extra
- NEW lids Enough for Jars and have extra
- Water, lots of Water From the tap, of course.
Instructions
- I strongly suggest you have a clean kitchen, counters decluttered and clean and an empty sink. This is a process that will take over your kitchen and you will need room and the sink. You will want a clean stove too. When you are well prepped, this always goes better. You need your jars and rings sterilized either in the dishwasher or by hand. They cannot be dirty.

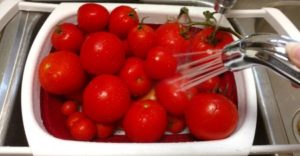
- With your strainer, you want to wash your tomatoes in the sink. I saturate them in some vinegar and let it soak for a bit and then start washing. Throw away any bad tomatoes. You do not want to process these ones.
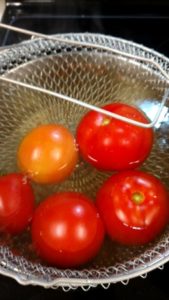
- With your stockpot or large saucepan begin to boil water. Once it's boiling use your metal chef basket to gently place the tomatoes into the pot. You will need a large bowl with ice and water on hand. You're waiting until the tomatoes begin to split, once that happens they're ready to come out and be placed in the ice to cool down. We are promptly cooling them because they will otherwise continue to cook from the heat and be impossible to handle.
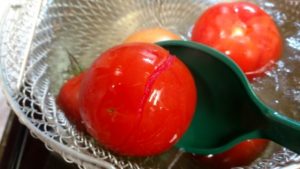
- We boil the tomatoes because it causes the skin to separate from the rest of the tomato without making a huge mess. Then typically only the top needs to be cut off. If I have someone helping me I have one person dealing with the tomatoes in and out of the boiling water and one peeling the tomatoes. If I'm by myself I gather all the boiled tomatoes and then start peeling. The skin and stem and any bad or buggy parts will be thrown away.
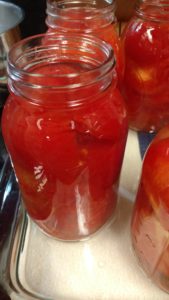
- This is when I place the jars in the large pyrex glass dish. I use the mouth funnel to help keep the lip of the jar from getting too dirty as I add tomatoes. You want to pack the jar with the tomatoes so that their isn't too much air space.
- Once you have all the jars filled add a 1/2 inch of salt if you desire. You will want to add 2 tablespoons of lemon juice to each jar. This helps make sure the tomatoes are acidic enough so that they cannot grow botulism. Tomatoes are right on the border so it's best to add an acid to guarantee you won't have an issue.
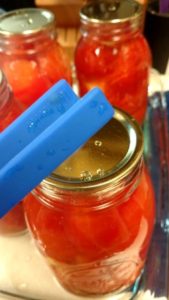
- Boil water in another saucepan, as this water will be added to the quarts. As you carefully add the boiling water you need to leave 1 inch of headspace at the top of the jar. The Canning Essential Box comes with a device to help measure the headspace. That same device helps you get the water bubbles out of the jars as you push and stir everything around. You may need to add or take out water at this point. You can use any plastic spatula to help remove water bubbles for this (don't use metal though).
- In a small saucepan add the lids and rings to the water, you want the water to boil and then move to simmer.
- Use damp handtowels or wet paper towels and wipe off the rim of the jar to make sure no food is stuck to it. Once it is clean, I dip a paper towel in a bit of vinegar and wipe around the top to help make sure I will have a good seal.
- The Magnetic lid lifter is wonderful in getting individual lids out of the water OR use your tongs (or try the fancy ones I use) to grab each lid. A fork can be helpful as well. I put the lid on, and then grab a ring. You can use the tool in the jar wrench to help screw on the lid (sometimes everything is super hot), but you must be careful that you only tighten it just until it closes. What causes the jars to seal is not how tight the rings are, but the seal on the lid. Tightening too hard can cause the jar to explode while processing.
- At this point we have gotten to where I need to give instructions for each canner, so choose the canner you are going to use for the rest of the recipe.
Notes
 **Pressure Canner**
- Your Canner should be clean and well maintained.
- If you are only doing 7 or less you won't need extra equipment.
- If you want to do a double batch, you'll need a rack.
- Always add a few splashes of vinegar into the water for your pressure canner so that the inside doesn't stain.
- With a Presto you will want the Canner Pressure Regulator. This makes your Presto Canner easier to keep at the right weight without having to watch it every second. You have to buy this separate.
- Place the lid on (It screws on), let the canner vent for 10 minutes on high and then add the weights.
- Since I'm at sea level I add 5 pounds of weights to the original weight (to make 10 lbs) and once the canner is up to pressure it begins to rock and rattle. I can then turn down the stove just to the point it keeps it at about 10 lbs. Now you will set the timer again.
- I need to be within ear distance to hear it continue to rattle but I don't have to stare at the canner the entire time.
- You want to do 10 Minutes at 10 lbs.
- Remember to check your elevation to see if you need to adjust the pounds though!
- Once it has processed for 10 minutes, turn off the stove and allow the canner to cool down, it will depressurize slowly to 0 pressure, let out steam and eventually the lid will be able to be opened easily (wear oven mitts!).
- If it's not opening up easily it's not ready yet.
- Do not let it sit overnight either, that allows it to cook too long and gives a bad flavor.
- Once you have the lid off, use your jar lifter to carefully pull out each jar and place on a thick towel.
- Do not place jar upside down or push the lid down.
- Within a few minutes the pressure will cause the lid to seal if it hasn't already, but it needs to do it on it's own, not us do it. If it doesn't work correctly there is a problem and you need to know this so your food doesn't spoil and you inadvertently consume it.
- You want these to sit for at least 24 hours to cool off before moving them.
- If you notice one is not sealing, move to the fridge and use within a few days.
- Before storing the jars you need to remove the rings.
- Remember the seal is from the lid not the rings. The rings can cause a false sense of them being sealed and the jar can unseal and then reseal with them on. We don't want that to happen!
- Your jar wrench can help take the ring off and you will want to clean off any juices before storing.
- Most Water bath canners fits 7 jars, however sometimes they fit 6 to 9.
- Work with what you have, do not double stack.
- The most important thing with this process is you do not want extreme changes of temperature to the jars.
- So if your jars are warm you don't want to add super cold water, or vice versa.
- Extreme changes can cause a jar to break. You want to have simmering water in the canner when you add your jars at the bottom, so if this is a second + batch you may need to remove some of the boiling water so it cools back down.
- Place your jars in the canner rack, lower rack to the bottom and then add enough water to cover over the top of the lid by 2 inches.
- Cover the canner and turn on high.
- Some stoves sell a coil that is made for canning so it takes the higher weight, and that is something you can invest in if you chose. Some stoves will work well by place the canner on 2 coils. Some just needs one, just do what works well for you. I have linked an example of a canning coil. They are not universal, please make sure you get one that works for your stove if you wish to do that.
- Once your canner is in a rolling boil (this can take 20-30 minutes), it needs to continue to boil for 50 minutes at sea level (again check to see if you need to add time to how long you are processing).
- You will likely turn down the stove a bit, so it's not over boiling all over the stove.
- After the 50 minutes that is has boiled consistently, turn off stove, remove the lid and let the boiling slow down and then pull the rack back up if possible and slowly remove each jar with your jar lifter and transfer to a thick towel.
- Use the same directions now as the pressure canner once the jars are removed.
- Your steam canner should be clean and well maintained.
- Read through all of the instructions, as this one can be a bit trickier then the old Hot water bath canner.
- Use the bottom rack that holds the jars.
- Place your jars carefully in the canner.
- Add 4 cups of water.
- Add a couple of pennies to the bottom of the canner, as the rattle will help you know it's still steaming and add a splash of vinegar to the water, as that will help keep discoloration from happening to the inside of your canner.
- Cover and line up the lid correctly.
- You want the holes that the steam will come out to not be directly hitting anything.
- Turn on high and within a few minutes it should start steaming out the holes.
- Once you have a good 10 inches of steam out the holes, begin timing for 45 minutes.
- You'll need to keep an eye on the canner to make sure the steam continues. the pennies should rattle..if you hear them rattling less, go check on the canner.
- Steam for 45 minutes.
- Once it's over, carefully turn the stove off (steam is coming out!) and allow to rest for 5 minutes. Use hot mitts so you don't burn your arms when you carefully lift up the lid AWAY from you, so the steam doesn't hit your face.
- Use your jar lifter and transfer the jars to a thick towel and leave for 24 hours.
Tried this recipe?Let us know how it was!